
San Francisco Sourdough Bread Recipe
 Here's how to make a real San Francisco sourdough loaf. This bread does not really taste sour. When you bite into a crusty slice, you get a tiny bit of sour along with a salty, rich taste and if you've baked it enough, a pleasingly bitter bite from the deep brown crust. This kind of bread takes time. Not only do you spend 2 weeks developing the starter and time out of your day to feed it regularly (although for me, "regularly" means 3x per week, not per day!) but you mix and knead it one day and bake it the next. How's that for slow? For me, though, it's really worth it. The taste is nothing like any bread I've ever made with conventional store-bought yeast. ***Let me just say that if you think caring for a bread starter regularly is out of the question, you can improve your conventional homemade bread by baking it a at a much higher temperature than the 350F suggested in most recipes. Bake it at about 450F and let it get a rich brown color, darker than usual. That should provide some depth of flavor.
The natural yeast rises very slowly which accounts for the rich taste of the bread. Quick-rising dough tastes more like paste. I have a "wicker" (for lack of a better term) proofing basket that my dough rests and rises in all night before I flip it out onto a baking stone in my oven to bake. So those two tools increase the bread's quality but the stone is absolutely optional. You can do great things even without it.
Here's the recipe:
3 cups of bread starter
approximately 3 cups flour
2 tablespoons salt
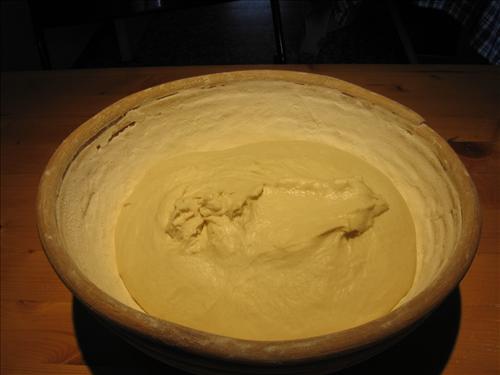
I ladle out 3 cups of starter into a large ceramic bowl then add a cup of flour and mix with a wooden spoon. I keep adding flour, mixing and scraping the sides of the bowl until the mixture is too thick to mix with the spoon anymore. Then I switch to my hands. I add another 1/2 cup of flour and knead the dough by folding it over itself and pressing down to flatten it again. I only add as much flour as I need to keep the bread from sticking to my hands too much. The better you get at kneading, the less flour you will need and thus, the better the crumb (inside, non crust part) of the bread. With minimum flour, you can achieve a crumb full of big, fat holes that look like stalagmite and stalactites. Conversely, the more flour you add, the heavier the crumb will be.
I knead the dough for 5-8 minutes then let it rest for at least 20 minutes (and have left it up to a few hours this way without apparent adverse effects). I add the salt and knead the dough a second time. The salt seems to help the dough be more cohesive and less adhesive. This goes on for another 5-8 minutes. Hey, if you have a Mixmaster, use the dough hook on it and relax with a drink. Otherwise, use your elbowgrease.
 Now I put the dough into my floured proofing basket (I've furnished the 3 people who have taken bread starter from me with these baskets since I don't know where to find them in Italy). Music to proof dough by: San Francisco post-punk good-enoughs, Green Day. I place the basket into a plastic grocery bag , balloon it out and tie it closed. Now the bread has room to rise and will not dry out while it doubles in size on your kitchen counter and then rests in the fridge overnight.
 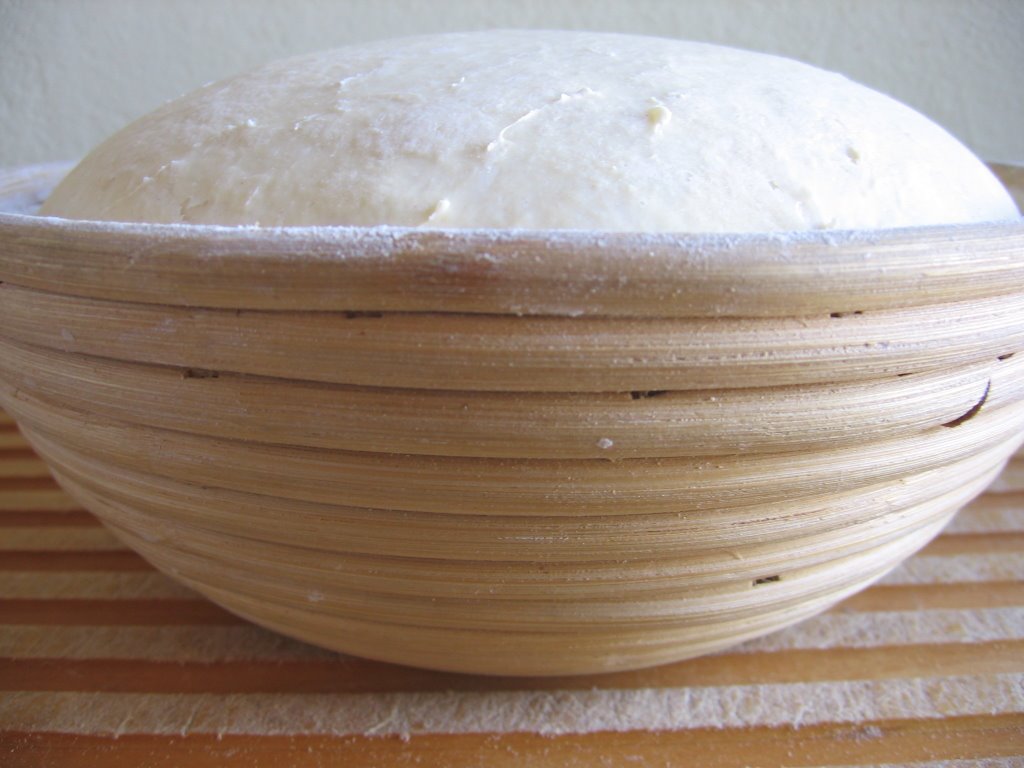 The next day (could be morning, noon or night, the bread won't suffer either way) I take the bread out of the fridge and remove the plastic bag. Now the bread should slowly increase in temperature and the top should dry out. Once the top is dry, turn the oven on to its highest setting (mine is 500F) get a water spray bottle ready and flour a baking sheet if you don't have a bread stone. Once the oven has reached 500F, turn out the bread onto the baking sheet. Now the dry top will be the non-sticking bottom of the bread and the new top will be the bulls-eye design from the weave of the basket. Open the oven, spray it with some water and close it. Slash the top of the bread in the shape of the letter C and immediately put it in the oven. Spray the oven again.
  After about 2 minutes, spray the oven a third time being careful not to hit the bread with the spray. After the first 5 minutes, lower the oven temp to 450F and bake for 20 more minutes. After that, turn the bread 180 degrees to make sure that it bakes and browns evenly. The left rear of my oven is a lot hotter than the front right side. Once turned, bake the bread for another 25 minutes.
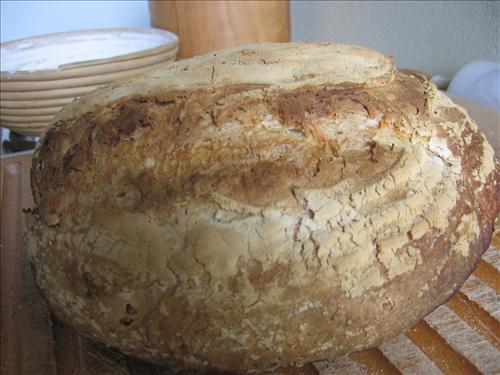
 Take it out when it is a rich brown color and sounds hollow when you thump it. Let it cool on a rack then enjoy.
posted by Susan in Italy @ 11:18 PM
![]()
![]()
6 Comments:
Thanks for the great tips! I always wondered why my breads were so dense. Maybe I add to much flour? The plastic bag is a great idea too, I'm gonna try!
Gorgeous, Susan!
I wish I could have some of that bread slathered in salty butter. Yum!
Tracie, any time you're ready, let me kow and I'll mail you some schlop.
Estelle, Sure! I hope the ideas work for you.
Ivonne, Sounds like a great breakfast.
the bread looks incredible. I think I should just stop by your house when I'm in the mood for sourdough... We don't eat enough bread to justify making this but it sure looks incredible! I swear I'd eat it if we were more than 2!
Susan - I just had a note from Betul at Rustic to say she was going to try my sourdough recipe, and yours too, so I found your blog, and am delighted to have done so. I look forward to reading more of your delicious posts.
Excellent, your ingredients are as authentic as it gets! I am following your method and my loaf is slowly rising as i type.
btw my music to bake by: Pere Ubu and Captain Beefheart and the Magic Band. Cheers!
Post a Comment
<< Home