Saturday, April 29, 2006

Taramasalata


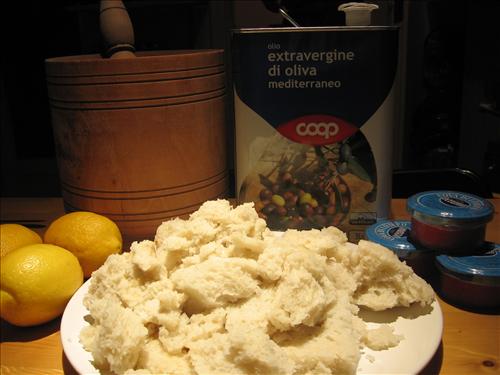
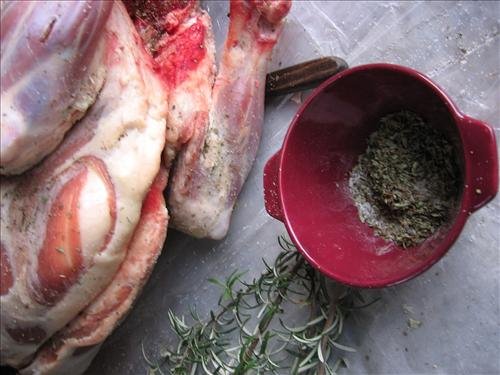
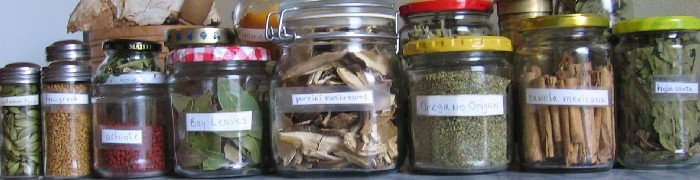
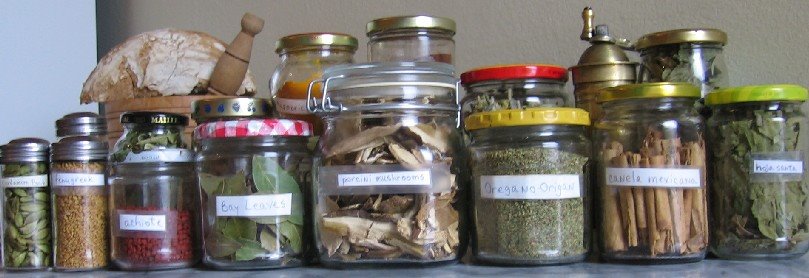
On the left, you see some odds and ends of my homemade bread. It comes from a culture I started about 2 years ago and that now lives in my fridge. On the right, ingredients for "Taramasalata" a dip made from carp roe "caviar" (yummy!), lots of stale bread (getting even better, no?), extra virgin olive oil and freshly squeezed lemon juice. I promise this is not just not-as-bad-as-it-sounds; it's actually delicious. *****IMBB #25, Derrick of "An Obsession With Food" has asked us to give our ideas for recipes using up stale bread. I'm happy to share this one and even happier to see all the creative ideas other bloggers have come up with.
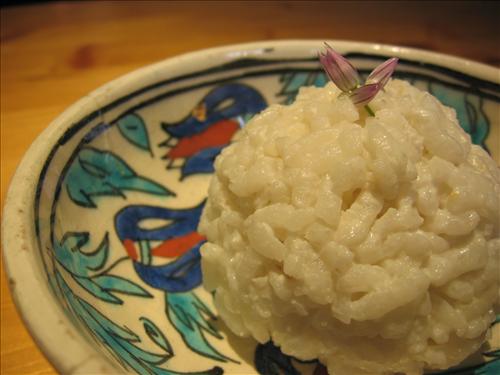
Last Sunday, we had yet another smaller Easter celebration and made a Greek dinner for some friends. One favorite menu item was Taramasalata. Making taramasalata is somewhat similar to making mayonnaise in that you seek to achieve an emulsion with oil and lemon juice. Here, though you will alternate adding oil then lemon juice and oil again. Each time you add oil and stir, you will thicken the mixture and when you add lemon juice, you’ll thin it out. The best type of bread to use is a sturdy, several-days-old, semolina loaf. You don’t want any bread that turns to paste when wet. Here's the dish:

4 ozs very dry white bread, crusts removed
juice of 2 lemons
1 ½ cups extra virgin olive oil
1 jar (10 oz) of tarama (carp roe) **Found at Greek grocery stores.

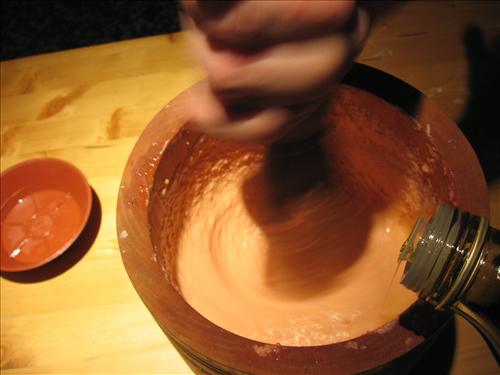
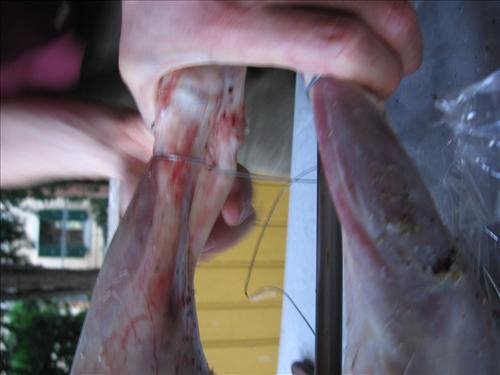
Soak the bread in cold water for 10 minutes, then cut off the crusts (much easier after the bread has soaked) and squeeze out as much water as you can. Place the bread in a very large, wooden mortar & pestle (a Goudi, pronounced goo-THEE)(see upper right-hand photo) along with the tarama.

**DISCLAIMERS: You may have noticed in the ingredients photo that I do not actually have tarama. It seems that Italy, a close neighbor of Greece doesn't import the stuff. I typically buy it in Chicago or Minneapolis and re-import it back across the sea to Italy whenever I get the chance.
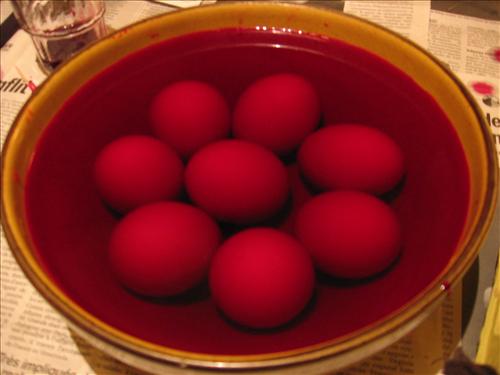
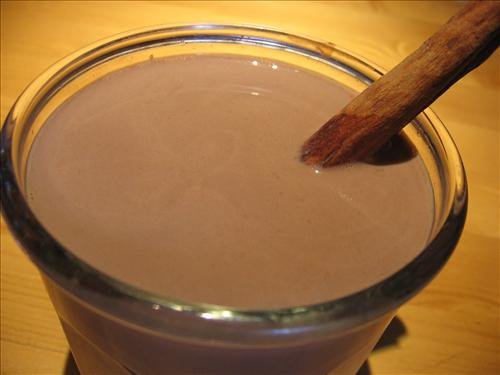
This time, though we used "uova di lumpo", which turned out nicely, if a little too pink for my taste. This is an old-school recipe. Most Greeks who make their own Taramasalata these days use a food processor. Gabriel believes that the mortar and pestle way gives a better texture, so we do it the traditional way. He's also good at making mayonnaise from scratch which you should be if you want to make this by hand.

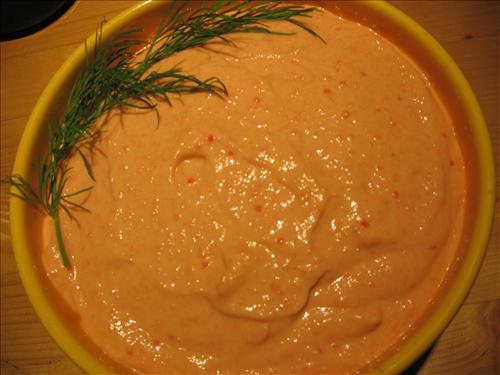
Pound and mix the bread and tarama together with the pestle to form a uniform paste. Music to pound and mix tarama by: Alt-accordion rockers, They Might Be Giants' "Istanbul (Not Constantinople)". Try to keep you mind off the pounding violence between Turkey and Greece represented by the song and focus on the mixing of these cultures that exists despite so much nationalism. Slowly add olive oil in a thin stream (about 1 tbsp at a time) while stirring and grinding with the pestle. Stir vigorously to incorporate, then add another tablespoon. Continue like this until you have added ½ cup of oil and the mixture is rather liquid. Now add 1 tablespoon of lemon juice and stir to incorporate. Add another tablespoon and incorporate again. Alternate between adding oil and adding lemon juice until you have a thick, mayonnaise-like consistency, and the taste is a balance between the flavors of lemon, seafood and salt.

Tagged with:

Thursday, April 27, 2006

Carrot Cake With Walnuts

I adapted this recipe from "Larry Rosenberg's Carrot Cake" in The Martha Stewart Cookbook. Larry's version is delicious but I wanted to experiment a bit with the spices. I added allspice to the dough and replaced the vanilla in the icing with cardamom and lemongrass. I first made this cake for a group of Italian friends thinking that I could introduce them to something new and convince them that "American" food is better than they thought. When they tried it, though, they all seemed to be familiar with carrot cake. So, is carrot cake NOT American? I had it up there with bagels & lox, clam chowder and southern barbecue. Am I wrong? The Italians liked it enough to ask for the recipe. Here it is:

Ingredients for cake:
2 cups sifted all-purpose flour
1 teaspoon baking powder
1 teaspoon baking soda
1 teaspoon ground cinnamon
1 teaspoon ground allspice (or a combination of any of the following: powdered nutmeg, clove, and ginger)
¼ teaspoon of salt
1 ½ cups granulated sugar
1 cup vegetable oil
3 eggs beaten
2 cups grated carrots

Ingredients for icing:
8 ounces softened cream cheese
½ cup sifted confectioners' sugar
2 sticks softened unsalted butter
2 tsp whole cardamom pods
1 tsp dried lemongrass (or try ground ginger or, of course, vanilla extract)

Finishing touch:
½ cup finely chopped walnuts plus optional walnut halves or marzipan carrots.


Instructions:

TO MAKE THE CAKE: Preheat the oven to 375F. Cover 2 round cake pans with a thin layer of butter and then dust with flour and shake out the excess. The pans should be 8 inches and 6 inches in diameter, respectively. Line the bottom of each with parchment paper.

Stir together the flour, baking powder, baking soda, cinnamon, allspice and salt in a medium sized bowl. Set aside. In a large mixing bowl, beat sugar, oil, and eggs until light and fluffy. Stir in the grated carrots. Add the sifted dry ingredients from the medium sized bowl and stir to just barely mix. Overmixing might make the cake tough.

Pour the mixture into the prepared pans and place them in the oven. Immediately reduce the oven temperature to 350F. Bake for 30 minutes or until cakes are done in the center. This time it took me 40 minutes, so keep checking. (Place a toothpick into the center of the cake, pull it out and if it is clean, no bits of cake clinging to it, the cake is done.) Let cakes cool on wire racks before removing them from the pans.

TO MAKE THE ICING: Crush the cardamom pods and extract the seeds. Grind them to a fine powder along with the lemongrass in a mortar and pestle or spice grinder. Ideally, combine all icing ingredients in the bowl of an electric mixer and beat at a low speed for 3 minutes. Scrape down the sides of the bowl and beat at high speed for 5 minutes more. (I do not have an electric mixer so I just beat the icing with a wooden spoon until my arm ached and I was out of breath, about 30 seconds. The result was not as smooth but what can you do?) Music to beat icing by: The Best of Jonathan Richman and the Modern Lovers. Their childlike yet very stripped down proto-punk rock sounds will energize you while you beat the crap out of that icing.

Spread the icing smoothly over the top and sides of each layer cake. There is enough icing to coat the cakes with 2 layer s of icing. Do the first, called a “crumb layer” due to all the stray crumbs that can still be visible in it, then place cakes in the fridge or freezer for a couple of minutes until icing is hard. Then proceed with the second layer. This will look smoother and more attractive. Press the chopped nuts into the sides. Stack the layers. You may want to decorate the top with, say, marzipan carrots or walnut halves.

Wednesday, April 26, 2006

Bay Leaves, Sushi, Fenugreek & Indian Backbeats

Hi Everyone. Here are four fun facts for your reading pleasure.

  1. Fresh Bay Leaves Smell Like Bubblegum. Do you have access to fresh bay leaves? Not the dry ones sold in the spice section of the grocery store but the ones they sell for way too much money in the “fresh herb” corner of the produce section. Scratch and sniff one of the leaves and you will, I swear to it, be transported back to your gum smackin’ childhood. It is the essence of bubblegum.


  2. Sun Myung Moon Sushi According to this week's "Wait, Wait Don't Tell Me!" most of the sushi-grade raw fish available in the U.S. is supplied by "True World Group", part of Reverend Sun Myung Moon's Unification Church empire. Yowza! For more info, read here. Is "Moonie-Free Sushi" next?

  3. Fenugreek Reportedly Enhances Breast Size. Google the word “fenugreek” you know that spice commonly used in Indian curries? Well, google it and before you get to any recipe or definition, you will hit 6-7 pages about breastmilk production and breast size enhancement. I clearly don’t have enough fenugreek in my diet. Sigh. Oh, and according to Mahanandi, if you have any extra whole fenugreek, you can actually plant the seeds and grow the plant which is a lovely leafy green veg.


  4. Susan Campbell, Indian Hip Hop Expert? my site is the first to come up when you google: top club hip hop with Indian backbeats. Heh, ya jealous?

Monday, April 24, 2006

Greek Red Easter Eggs

Last night, the actual Greek Easter, we had a small dinner party with some friends. The week before in Geneva my mother-in-law, Rita and I made a batch of traditional deep red Greek Easter eggs and last night we used them in our own little egg smashing competition. The process of dying them is the same as any standard pastel Easter egg coloring technique, but in Greece they do a particularly neat decoration of leaf imprints on the red background. Here's how we did it:

We set the eggs in a pot of cold water, put that over a high flame and once the water came to a boil, we lowered the heat to medium and let them softly boil for 5 minutes. In the meantime, we took a package of "Paschalia" "non-toxic, European Union Approved" Easer Egg Dye*, and mixed the contents with 1/2 cup white vinegar (in a glass we promised we'd never use again because of the red staining - Could this be the origin of the Greek plate-smashing tradition? Hmmm...

*Imagine how strong Greek Easter egg dye must be to render white eggs, not pink, but blood red!

Once the eggs were finished boiling, we took them out of the hot water and cooled them down. With some parsley, rose and I don't know what leaves clipped from the balcony plants, we proceeded to make the decorations.
We cut approx. 3 inch pieces from an old (but clean) pair of nylons. We placed one leaf onto an egg and stretched the nylon over everything, tying a knot in the back with some string. It's best to have two people working in this together, one to stretch and tighten the nylon and the other to tie the string.
Then in a bowl we'd promised never to use again either (opaah!), we put the eggs in and poured cold water to cover. We then poured in the vinegar/dye mixture and let the eggs sit for 5 minutes. After that, we returned the eggs to their carton and let them completely dry before cutting off the nylon and revealing the leaf pattern.

The final step was to take a paper towel, dip it in oil and rub the eggs with it to give them a shiny glow. Music to shine eggs by: The Strokes, "Is This It?" The track, "Last Nite" blends the best of hard-ass rock n' roll with Julian Casablancas' loungey lyrics. Have a listen. After that, you're ready for the Easter egg smashing competition!

Saturday, April 22, 2006

Mamuang Kao (Mangoes and Coconut Sticky Rice), well without the *mango…

What to do when a recipe (like yesterday’s) calls for 1 cup coconut milk and you have half the can left over? Make Thai Coconut Sticky rice! This is one of a handful of magic recipes that despite the simplicity and few ingredients turns out stunningly delicious. (the others are: Potage Parmentier, Aigo Bouido and Patatas a la Riojana.) Coconut sticky rice has rice, coconut milk, sugar and salt. That’s absolutely the fewest ingredients I’ve ever seen in a Thai dish.

*ITALIAN MANGO DISCLAIMER: Italy is absolutely NOT a mango country. I’ve heard people coming from India who live in the U.S. complain about the quality of the mangoes there and they probably have a point but I tell you, mangoes here go from rock hard to brown and rotten without any ripe, delicious period in between. So this dish is much better off without mangoes from Italy. I've entered this recipe in the "Jihva for Mangoes" event.
Here’s the dish:

1 ½ cups cooked Thai sticky rice or sweet rice (or even Arborio in a pinch, I won’t tell)
1 cup coconut milk
½ cup granulated sugar or palm sugar
½ teaspoon salt

In a small sauce pan, boil the coconut milk with the sugar and salt until dissolved. Music to boil coconut milk by: Kid Creole and the Coconuts! Who else? Pour over the rice that is cooked and still warm. Let stand for at least half an hour. Serve at room temperature or chilled. (If you have good or even passable mangoes, add them on the side in slices.)

Friday, April 21, 2006

Thai Meatballs in a Coconut milk, Peanut Curry Sauce (Panaeng Neua)

Otherwise known as Thai Swedish meatballs. This is one relatively simple Thai recipe as it has “only” 11 ingredients. Cooking Thai food requires commitment, not that the dishes are hard or time-consuming to make but that the dishes usually require a pantry stocked with galangal, Keffir lime leaves, red, orange or green curry paste, cilantro roots (yes! the roots), tamarind paste, dried shrimp powder, fish sauce, lemongrass, and so on. Once you have these things clogging up your shelf space and fridge, you often feel the responsibility to use them, not let that bottle of fish sauce go bad. (Can fish sauce, a product made from already fermented fish, actually go bad? What would the definition of rotten fish sauce be?) Anyway, I really like this dish and it quick to make, and it’s not Greek which is probably a relief to some of you! Here’s the dish:

1 lb ground beef
flour for dredging (coating) the meatballs
2 tbsp vegetable oil
4 cloves garlic coarsely chopped
2 tbsp plus ½ tsp red curry paste
1 cup coconut milk
1 tbsp peanut butter (chunky if you have it)
2 tsps sugar
1 tbsp fish sauce
1 tbsp chopped chives (or green onions)
1 tsp chopped mint.

Mix ½ tsp red curry paste with the ground beef and form 50 1-inch diameter meatballs. Place some flour in a plastic bag with no holes. Drop 6-7 meatballs in at a time , shake the bag and the meatballs out dusting off any excess flour. Heat the oil in a large frying pan over medium heat and place the meatballs in. Sautee the meatballs, that is frequently shake the pan to get them moving around and brown on all sides. Music to sautee meatballs by: New York punk classics, The Ramones. "Rock, rock, rock, rock, rock n' roll high schoooool" Actually if you slowed the speed down and took out the guitar feedback, the Ramones would sound a '50s doo wop group. It's true, listen. Once the meatballs have been in the pan for 5 minutes, add the chopped garlic and shake the pan some more. Cook for 2 minutes and remove the meatballs and garlic, reserving some of the oil. Now add the rest of the red curry paste to the pan, stir and spread it with a spatula for 2 minutes. Add the coconut milk and peanut butter and mix them thoroughly with the curry paste. It will take 3-4 minutes for the ingredients to form a smooth consistency. Now add the sugar and fish sauce, combine and return the meatballs and garlic to the pan. Simmer the dish for another 2 minutes, take off the heat, sprinkle the herbs on top and serve immediately.

Wednesday, April 19, 2006

Our Non-Lamb Delicacies


Samuel's real vanilla bean panna cotta with berry coulis and Diane's chocolate/amaretto semifreddo. They were sooo delicious!


Here are Rita's chicken "Kokoretsi" and an appreciative Antoine gobbling up everything to the last drop.


"Thanks for the Kokoretsi, Rita!" Roquefort, Brie and Gruyere, Mmmm...


Michelle and Bertrand, our gracious hosts. Thank you both for such a lovely Easter!

Here Are Our Star Turners


Diane and Gabriel are up top
Caudia and Bertrand are in the middle
Manuel and I are at bottom

Tuesday, April 18, 2006

Greek Easter Lamb Roast Part II

The next morning after preparing the lamb for roasting, we slept like babies. Well, honestly, we slept like babies with black-out shutters and no alarm clock. Gabriel's dad, Manuel got up at 7:00 and headed over all alone to Michelle and Bertrand's to start the fire. He used an approximately 5 foot by 3 foot metal tray in which to start the fire. Boy do I wish we'd had something like that for Paul's and Marcy's backyards. They each have hosted lamb roasts in Minnesota and we had to dig out lawn and flowers to do it. Ugh! So alone, Manuel started the fire (made this year with logs and real-wood charcoal) and staked the spit's 2 vertical parts about 2 feet away from it. That's how you start out. If you want everything to cook on the inside without burning the outside, you need a lot of indirect heat. He turned and he turned and he turned some more. Bertrand might have been home to help for some of this but I think he went to church. Finally at 10:00 we strolled in. (What's the first person plural for mea culpa?) By then the fire tray was about a foot away from the turning lamb. So we started turning. Gabriel periodically added new wood and charcoal to keep the fire burning evenly. Then other people came. I gave up the spit handle to Blaise who was happy to take over. There is not much process involved in the cooking; the most important thing to do as the host of a lamb roast is to provide refreshments to a long list of spit turners. Oh and kids; kids dig this unless they're freaked out by it. They love turning but usually can't do it all that long. Make sure lots of people come early otherwise you'll end up doing a LOT of turning yourself. The nice thing is that Sunday was lunch for 26, so there were plenty og turners. In the am, we got espresso and colomba slices (Easter's answer to Panettone) then in the pm we graduated to small glasses of white wine and - wait for it - entrails! Yep. Rita prepared a pretty delicious mezze dish of chicken livers, kidneys and gizzards in a very Greek oregano/lemon/olive oil sauce. We all gobbled them, even the kids (well, I had my 1 relatively unadventurous liver). And that's what fueled the turning.
At about 11:30 the fire tray was only inches away from the lamb and by 12:00 it was directly under it. The process goes something like this: (Manuel, correct me if this is wrong, ok?) You begin with the lamb about 2 feet away from the fire and after the first two hours, you move it one foot closer. An hour and a half later, you move it to about a six-inch distance. You keep it there for about another hour and a half when you move it on top of the fire and cook for the last hour that way. If you have a fire built on the ground, sedentary, you can rather easily move the spit's two vertical stakes. About every half hour or so you'll want to baste the lamb. Music to baste lamb by: Rembetica. This Greek by way of Smyrna musical form has been compared to the blues but that is true only for the lyrics which reflect the hard times of a displaced underclass. The melodies are wild. A great way to do this is not to use a big, barbecue basting brush but to cut a lemon in half, strip away 1 centimeter of rind and stick a big barbecue fork into the side of the lemon (see photo). Now you can dip the lemon into a small bowl of olive oil, pepper and oregano and rub it along the lamb.
Now get a load of the poor, suffering tulips in this photo. I don't know if Michelle, resident gardener will ever forgive us for sauna-ing them to death. Finally at 1:30 pm the lamb was done and it was time to eat. Everybody except the butchers went inside where they all selected hard-boiled, decorated Easter eggs and proceeded to have an egg-smashing competition. Wish I'd have gotten some of those photos! It's fun. You hold your egg, pointy end out and ram it into your neighbor's egg who's doing the same as you. The person whose egg doesn't crack wins. The winner proceeds to the next person down the line until an Easter Egg Champion is established. I don't know what they win, the honor and respect of everyone else or maybe the right not to have to eat the egg. (Sorry, I'm not a fan). Easter eggs drizzled with walnut oil with a green salad is the first course, then comes the lamb. The skin is crispy, the meat is tender and well seasoned (remember the poking and the garlic from yesterday?) So two people take the beast over to a large table totally covered in plastic and remove all those bits of wire (remember yesterday?) then with sharp knives, bone-cutting kitchen scissors and one big hatchet, they get to work. During the Easter egg competition, the lamb has been cut into serving pieces, put on large trays and expedited into the dining room. Now, you would not BELIEVE this dining room. I said that there were 26 people for Easter lunch and we ALL fit into one long long long banquet table. Ok, it was probably three tables connected but still... The lamb came accompanied by lovely brown oven-roasted potatoes with whole coriander seeds, made by Jacqueline; a nice touch and very original. For dessert we had a vanilla panna cotta with berry coulis prepared by Samuel and a chocolate/amaretto semi-freddo made by Diane from Florence. (see photos in the next post) Whew! They were delicious. And so ended a scrumptious and well-deserved meal. Can't wait 'til next year!

Monday, April 17, 2006

Greek Easter Lamb Roast Part I

Vegetarians beware. This is gonna get ugly. (For the rest of you, though, I've gotta say, I did it and I'll do it again!)

It started out really very civilized. We walked through downtown Geneva Switzerland to get to a friend's house. Met the in-laws there. Sipped a Saturday-afternoon Jasmine tea together in Michelle and Bertrand's lovely, lovely Geneva kitchen. Crunched ginger snaps. Engaged in polite conversation. Regarded each other in the calmest of manners.

Then barbary set in. You see, we didn't come to sip tea; we came to turn a lamb into dinner. So there it is, I said it. After all this isn't something people haven't been doing for thousands of years. We have tradition on our side. And hunger.
In fact ever since meeting Gabriel in March of 2000, I have participated in at least seven or eight lamb roasts. When we lived in Minneapolis, Gabriel actually had a 5-foot spit made by an iron worker, an artisan really, judging by the way he rendered Gabriel's drawings into metal. So in Minnesota, Gabriel is known for his big back-yard lamb roasts whether it be to celebrate Greek Easter or just an excuse for an extended get-together. Now that we live in Italy, the Greek Easter celebrations take place at Michelle and Bertrand's house because they are the only ones we know who have a yard.
So here you'll get a primer on preparing a whole lamb for slow back-yard barbecuing. Our lamb weighed in at 16 kilos (35 lbs) and was skinless and whole minus head and hooves. The day before cooking, we prepared it with a kind of dry rub and let the lamb absorb the flavors overnight.
Greek Lamb Dry rub:
1/2 cup Greek oregano
1/4 cup salt
1/4 cup white pepper
1-1/2 heads garlic

1-35lb lamb
*Optional fresh rosemary sprigs

Equipment:
1 5-foot long spit with 2 supports
12 gauge wire
pair of pliers
20 feet of plastic wrap

Greeks do a dry rub like this: Put the oregano, salt and pepper in a bowl and reserve, then peel the garlic and slice the cloves longways into spikes. That means quartering the smaller cloves and cutting the larger ones into six long spears. With a very sharp knife, pierce the meat laterally, that is don't make a cut into the meat going toward the bone, but make the cut parallel to the skin. Take a pinch of the spice mixture with your fingers and insert it into the hole. (See photo above). And 5 minutes ago, you were just sipping tea! This process really brings home the symbolism of Christ, Lamb of God and all, except that YOU'RE the Roman soldier. Then take a garlic spike and insert it into the same hole. Make another hole about 4 inches away and repeat the process. Once you have spiked the whole beast with garlic and spices, rub the remaining spice mixture all over the meat and into the cavity. If you like you can put a few rosemary sprigs into the cavity as well.
Now it's time to tie the lamb to the stake. Ugh, sorry, more Jesus references. Before writing this, I never really made that connection. You must have a metal spit for this. The spit goes through the neck, through the body cavity and out the end. Two pinchers on each end pierce the meat at the shoulders and tops of the legs. You must secure the lamb better than that though if you want it to keep turning for 6 hours over the fire. You must take 3 12-inch long lengths of wire and thread them from the inside of the cavity around the spit and through to the back of the lamb, encasing the spit and the spinal cord.
Twist the ends of the wire with a pair of pliers very tightly so that the lamb will be secure against the spit. Then take another foot-long stretch of wire and wrap it tightly around one of the ankles then bring the wire under the spit and wrap the other ankle joint. Then you will pull the wire tightly and tie by twisting the two wire ends together with the pliers. This is similar to what you do to truss a turkey. Do the same thing with the fore legs.
Finally it is time to close up the cavity. Music to stitch lamb by: Chicago Sub Pop favorite, Red Red Meat. Well, what were you expecting, chamber music? You will take a 2 foot-long stretch of wire and "sew" up the two sides of the vertical cut at the abdomen. To secure the first stitch, run the wire through the two sides of the belly cut and pull almost all the way through. Bend the end piece up and twist it around the piece coming out the other side to make a closed loop. Then continue to "sew" up to the top and make a final loop at the top as well.
Now you're ready to store the lamb. The easiest way to wrap it in the plastic is to have a team of three people. Two hold the ends of the spit and slowly turn while the third guides the plastic to smoothly wrap everything without any bare spots. Now, you Americans can place the whole lamb in your enormous refrigerators. The rest of you can put the lamb unrefrigerated in a basement or garage. I have eaten many lambs that had stayed out all night w/o refrigeration and I have never gotten sick. The 6 hours of cooking the next day seem to take care of that. Well folks, that's that for today. Tune in tomorrow for Easter Sunday cooking tips. And more pictures, of course.

Friday, April 14, 2006

Spiced Hot Chocolate (or Chocolate Milk)


Hot chocolate is another of my favorite cold-weather drinks. But now the weather's getting warmer, it's great chilled as well. While I love the packages of spiced Mexican chocolate and the gorgeous Mexican hot chocolate whisks, called molinillos, I prefer to make the drink from scratch since I think cocoa powder gives a richer flavor than the prepared chocolate disks of the Mexican variety.

1 liter/quart whole milk
4-5 tbsp turbinado sugar
¼ tsp salt
¼ tsp ground allspice*
1/8 tsp cinnamon*
5 tbsp pure, unsweetened cocoa powder
*Instead of these spices, consider ground cloves, cardamom, ginger, vanilla, even a tiny dash of cayenne pepper!

Pour the milk into a medium saucepan and add the sugar before heating over a medium flame. (My belief, not scientific, is that the sugar helps to keep heating milk from forming a skin on the surface as well as on the bottom of the pan. Of course whisking like crazy helps too. I suggest you do both.) Music to whisk chocolate by: "Vamonos" by Rock en espanol greats, Cafe Tacuba
While the milk is heating, add the salt (creates real depth of flavor here) and the ground spices and whisk them in. After about 2 minutes, the milk is warm enough to absorb the cocoa powder without it globbing into lumps. So add the cocoa powder now and whisk even harder than before to incorporate everything. Continue cooking and periodically whisking for another 3 minutes. The milk should just get hot, never boil!, so I find that 5 minutes over medium heat achieves that well. Serve immediately or let cool completely for cold, spiced chocolate milk.

**Frivolous, Martha Stewart-y serving suggestion: Place a long cinnamon stick in each mug as a flavorful and decorative stir.

Wednesday, April 12, 2006

Mysore Pak (My Sore Back!)


CHAPTER 1 INTRODUCTION

Actually if you compare this sweet, sweet, crumbly Indian treat to the Indian Milk Fudge I made earlier, the sore back homonym is not appropriate at all**. Mysore Pak is rather quick to produce, more like 15 minutes of cooking rather than 1 hour and 10 minutes. So that’s not so bad, right? This dish does, however require a good deal of know-how both of what the final product should be like (I didn’t know the first time) and about the physics of candy-making. The texture is a little tenderer and denser than a Scottish shortbread. This recipe is quick to make, but picky. They say cooking is an art and baking is a science. This dish doesn't go in the oven but sure as death and taxes, it's science. But, if you have 2 good medium-sized sauce pans (not non-stick), a functioning candy thermometer, a silicone spatula and a heavy-duty sweet tooth, I suggest making this lovely dessert/snack.

**By the way, is there anyone out there (Lotus?) who knows how to pronounce this correctly? I’m thinking “Mysore Pak” may not actually sound like “my sore back”. Ideas?

CHAPTER 2 THE STORY

I failed miserably attempting to replicate 2 other bloggers’ recipes for this dessert (Mahanandi’s for "Mysore Pak" and Rani and Raja’s for "Besan Ladoo", same ingredients, different quantities) and have found a happy middle ground. The latter had me frying 3 cups of chick pea flour with a pound of ghee for 5 minutes, then cooling it and pouring it into a very large mortar, then pestling in natural brown sugar and cardamom. I actually have a large mortar and pestle (though not like in Rani & Raja's photo!) I had no idea what the consistency was supposed to be like in the end. When was I allowed to stop pounding? A very messy kitchen, frustrated chef and a bunch of formless moosh later (tasty, though; I mean, I ate it and all)…

I went to Mahanandi where the chef and the commentors were very specific (but not very clear) as to how long to cook the mixtures and what the final product’s texture should be like. The chef had me cooking sugar and water until it reached the “one string consistency” (?!) I assumed the “thread stage” (230F-235F, or when you drop a bit of the hot sugar syrup into a glass of cold water and it drops to the bottom creating a single thread that will not ball up) Only problem is that it is impossible to achieve the well described desired result by following her directions. At least, that’s my story and I’m sticking to it! (Actually, Indira of Mahanandi is lauded for her step-by-step clarity. I agree totally with the usefulness of the step-by-step part and her photos, clarity though, not so much.)

I fiddled with Mahanandi’s methodology a bit. I also created a middle ground between Rani & Raja's and Mahanandi's ingredient ratios (Indira, 2 measly cardamom pods?) and came up with a happy, but more importantly workable, medium. If you really want to try this recipe, I suggest you read Mahanandi’s and Rani and Raja’s posts about it first to get a feel for what this is all about. Then, of course, follow MY recipe! ;) Here it is:

CHAPTER 3 THE RECIPE

2 cups sifted chick pea flour (also called Besan flour)
¼ tsp salt
250 grams (about 2 sticks) unsalted butter
¾ cup granulated sugar plus 1 tbsp
one scant ¼ cup water
1 tbsp whole cardamom pods (or any other powdered sweet spice you like. I’m planning to put cardamom and ground ginger in next time)

**THE DISCLAIMER, a.k.a. GHEE, WHAT’S THE POINT?

I believe in clarifying butter, i.e making Ghee (melting butter and separating the oily part from the white watery, and solid parts before using in a recipe) as RARELY as possible. I used regular butter here, folks! From the fridge to the pan, just like that and I think the results were just fine. If you plan to deep fry something Indian or otherwise use really high temperatures where the butter solids would burn and make everything taste acrid, Ghee is your product of choice, but not here! Thank God!

BACK TO THE RECIPE

Lightly crush and peel the cardamom pods and extract the seeds. Put them in a spice grinder or small mortar and pestle along with the 1 tbsp sugar and grind to a fine powder. Reserve.

**NOTE: In this recipe, you will be cooking two things simultaneously. Not to worry, though. One, the sugar syrup requires no fiddling at all, no stirring, just checking the temperature. The other, the flour and butter, you watch and stir about every 30 seconds.

Melt the butter over medium heat in a medium saucepan and simultaneously in another saucepan, cook the sugar and water over medium-high heat. Music to melt butter and sugar by: the soft, calming voice of Tracey Thorn in Everything But the Girl "Each and Every One" Tracey can keep your head cool as you're playing the mad scientist in the kitchen. Keep the candy thermometer in the sugar, swirl the pan periodically until all the sugar granules melt. In the other pan, as soon as the butter is totally melted, add the chick pea flour and combine with a wire whisk. Stir frequently but not constantly. Allow the paste at the bottom of the pan to darken to medium brown (the paste is generally light brown), then scrape sides and bottom of the pan thoroughly and let the bottom darken again, and mix again. This is approximately a once-every-30-seconds kind of process. The browning of the paste lets off a wonderfully nutty aroma while you're cooking and a complexity of flavor in the final product. Stir flour and butter while the temperature of the sugar rises. No need to ever stir the sugar at all. Once it reaches 225F, lower the flame to medium low, and let the sugar temperature continue to rise slowly. Mix the flour and butter again. Once the sugar temperature is 240F, add the cardamom/sugar powder into the flour/butter mixture and combine. Let the sugar slowly heat up to 245F. That is the “soft ball” stage, and the right time to mix all the ingredients together. Now, take a silicone spatula (does a great job scraping and won't melt) and scrape all of the flour/butter/cardamom mixture into the sugar. Stir, scraping the sides of the pan with the spatula and incorporating everything for about 30 seconds. The texture will be porous, like molten lava or a melty pumice stone. As soon as everything is combined, dump it all into a greased dish, smooth out the top and cut into diamond shapes before it cools and hardens. You have a good 2 minutes to start cutting the diamond shapes before the Mysore Pak gets hard and crumbly.

**What to do if you have no candy thermometer: If you don’t have a candy thermometer, you can take a bit of the sugar out with a spoon and drop it into a glass of cold water. When it forms a soft, stretchable ball, you have the right consistency. If it's more melty than that, keep cooking, if it is a hard, non-squooshable ball, just decide to drop this whole Mysore Pak thing and make caramel instead. ;)

Sunday, April 09, 2006

Homemade Pizza

***Before I start this post, I'd just like to list some of the great things about Italy:
1. The presidential election just started today and for the past week and a half, it has been illegal to publish opinion polls about it.
2. There are no blue or red regions or if there are, nobody discusses the strategies to "market" candidates to them.
3. Roberto Benigni (you know, the "Life Is Beautiful" guy) is on TV channel 3 right now reciting Dante. How cool is that?!

Ok, on to food...
Last night we went to Valeria and Simone's house for a homemade pizza party. Now, I haven't made my own pizza since I left the States because to me, the average pizzeria makes such a delicious product that I can't see the reason to make the effort myself. But if you're from Naples, as Valeria is, Milan must seem more like a pizza outpost than a pizza mecca. So these guys make pizza a lot. They have perfected their pizza crust recipe based on a sourdough bread culture (that I gave them) that they keep in the fridge and feed regularly. They made a lovely pizza bianca (a pizza with no tomato sauce is called "white" or "bianca") with sage, slivered baby onions and olive oil; a "caprese" pizza with cherry tomato, fresh mozzarella and basil leaves; a "puttanesca" pizza with cherry tomatoes, olives, anchovies, capers and mozzarella. And finally the coup de grace, panzerotti. Panzerotti are sort of like turnovers, stuffed fried mini-pizzas about the size of your palm. Theirs contained ricotta, parmesan and salami. Here they are being prepared. The panzerotti (Chicago's term for any stuffed pizza) differ from the Calzone (New York's term for same) in that the calzone is larger, entree-sized and baked. I have no recommendations of what to listen to while you make pizza but since Simone is a big jazz fan we ate pizza to Bird: The Original Recordings of Charlie Parker. Mmmm...

Look What Gabriel Did!!

For a while now, I've been unsatisfied with the looks of this blog and Gabriel has coded and tested and re-coded this all afternoon to produce what you see here. He is my partner in this blog as well as in life. Although you don't get much of his voice, most of the things I am able to do here, I can do because he taught me. Thanks, Gabriel!


Friday, April 07, 2006

Last Chance Polenta


C'mon! Hurry up and eat it before it gets too hot!

Springtime, for me is the last chance to make polenta, a hearty, cozy, warming kind of food totally anathema to summer. I used to love watching Mario Batali on the Food Channel, the times I got to see him anyway, not having cable. I bought the book “Simple Italian Food” by Mario and the dishes I have tried are delicious and like the book says, simple. Shockingly, there are only 4 ravioli recipes in this book. Mario seemed never to have a show without cutting, filling and folding pasta to make ravioli.

Ever since making one particularly disgusting dish (with a seductive title) for the 3rd time, I’ve learned to edit my cookbooks. I write notes in the margins about what ingredients I REALLY put in and how the dishes turned out so as to remind myself what to make again and what to avoid in the future. I never developed any scientific grading, just: “Boring, Good, Good!, Very good, Very good!, and Delicious!” Don’t ask me the difference between Good!, and Very good or why there’s never a “Delicious!” without underlining and an exclamation mark. It speaks more to how I was feeling at the time. Anyway Mario’s recipe for “Soft Polenta with Asparagus, Prosciutto, Garlic and Ramps” (the way I did it) got a ¡Delicious!, (the Spanish punctuation expressing my extreme happiness with the results of this one.) Here’s the recipe:

(serves 4 as a single-dish meal)
1 lb asparagus, trimmed and cut into 2-inch pieces
1 cup polenta
¾ cup mascarpone or cream cheese
2 tbsp butter
3 cloves of garlic, thinly sliced
a 4 oz slice of prosciutto or cooked ham, in a ¼-inch dice
12 ramps or fat scallions, roots removed and cut into 2-inch pieces
juice and grated zest of 1 smallish lemon
½ cup dry white wine

Mario’s original recipe gives you a soft and creamy polenta, nothing you could ever slice and grill, for example. He did not allow for any substitutions for the mascarpone, prosciutto and ramps, but included a boatload of butter and more mascarpone than I put here. I did the recipe strict-to-specifications the first time and I can say after having made it several times hence with all of these substitutions, that they work beautifully. And nobody needs 6 tablespoons of butter in a polenta dish. Well, maybe if it were January. In Quebec.

Bring 4 cups of water to the boil. Add the asparagus and cook until barely tender, 1-2 minutes (depending on thickness of asparagus). Remove the asparagus with tongs and place in an ice bath.

Now pour the polenta into the asparagus cooking water – off heat - while whisking constantly. Music to whisk polenta by: The Velvet Underground and Nico. “I’m Waiting for the Man” really gets your whisking arm going, then afterwards you can snicker at German Model, Nico's deep robotic Schwarzenegger voice on "All Tomorrow's Parties". Not that I want to ridicule her or anything, that voice adds a perfect unsettling touch to a band for whom "unsettling" would have been this highest of compliments. Once all the polenta is incorporated, start stirring with a wooden spoon for about 5 minutes. You will get a “Cream of Wheat” sort of consistency. Take off heat, cover and set aside.
In a large frying pan, melt the butter over medium heat and add the ramps or scallions. Cook for 5-7 minutes (again, depending on thickness) until they are wilted. Add the garlic, prosciutto, asparagus, lemon juice and wine and let the mixture come to a boil and cook another 2 minutes. Sprinkle the lemon zest on at the last minute before dividing the polenta among 4 wide, shallow bowls and spooning the sauce on top.

Tuesday, April 04, 2006

Indian Milk Fudge (Khoa) With Cardamom, Orange Blossom Water and Mastiha


I was seduced by Keiko from Nordljus’ recent post about a sort of Middle Eastern ice cream flavored with cardamom, rose water and gum mastic (a.k.a. mastiha – for definition and a short history of this lovely Greek product, click here or here). Why was I seduced?

1. Keiko’s pictures are stunning!
2. Cardamom is my favorite “sweet” spice
3. I’m intrigued to cook with this big tub of Mastiha I brought back from Greece
4. There’s nothing wrong with polishing off the last ¼ cup of Orange Blossom water
sitting on my shelf. Anyway, I have no rose water.

Thing is, I live in Italy, the world capitol of ice cream and I gave my ice cream maker away when I moved here (American plug, you see). So, I think the lovely flavors of cardamom, orange blossom water and gum mastic will go beautifully in one of my favorite dessert recipes, Indian Milk Fudge (khoa). “Khoa” is milk slowly simmered and stirred for about an hour until it is almost solid, fudge-like. Then sweeteners and spices are mixed in to create different deserts. This should be one of the best.

Here’s the recipe:
·1 liter/quart whole milk
·200 gr (approx a light 8 ozs) heavy cream
·1 tbsp whole green cardamom pods
·¼ cup rose water or orange blossom water
·Optional unless you’ve been to Greece recently: ¼ cup toffee-like gum mastic or “mastiha” (which is mostly sugar) otherwise, 1 tsp pure gum mastic crystals ground with ¼ cup granulated sugar, or since mastiha tastes like ¼ mint, ¼ clove and ½ ginseng, you might be able to make your own substitute. But add ¼ c sugar.

Crush cardamom pods. Extract the seeds and place them in a coffee grinder or mortar & pestle, grind them to a fine power. Music to crush cardamom by: Cornershop “When I Was Born for the 7th Time" Try your best to sing along with their cover of “Norwegian Wood” in Hindi:) Lyrics are at the bottom of the page.

Now, put on a nice, comfy pair of shoes and pull out the largest, deepest non-stick frying pan you have. Over high heat, pour in the milk and the cream, bring to a boil and stir constantly for 15 minutes keeping the milk boiling as vigorously as possible while not spilling out of the pan. Music to stir boiling milk by: Cornershop: Handcream for a Generation. After 15 minutes, lower the heat to medium and continue stirring and scraping the bottom & sides of the pan for another 20 minutes. Singing helps ward off boredom! After the 20 minutes have gone by, you’ll be belting out Track 7: “People Power” and the milk/cream mixture will have thickened to the consistency of heavy cream. Now lower the heat to its lowest setting and continue stirring and scraping the dried milk off the sides of the pan. This is all a rather unlovely affair. You’ve got thick creamy milk with a bunch of bits of dried milk floating in it. Don’t worry, it will all become solid in the end so the texture will be nice. After another 25 minutes have gone by (now you’ve been cooking for 1 hour total!) Add the cardamom, the orange blossom water and the gum mastic (mastiha) (or whichever other solution you came up with) and stir for another 10 minutes to reduce the mass to something like a bread dough. Take off the heat and remove to a marble slab or plastic cutting board. Let cool to room temperature and place in the refrigerator. The mixture will set into a hardish putty-like consistency. Take 1-teaspoonful bits and roll them between your palms to make little spheres. Keep them refrigerated in a plastic container for up to 4 days.

Sunday, April 02, 2006

Strawberries & Balsamic Vinegar

Those of you who have already tried this most blissful, fortuitous of combinations may think that dedicating a whole post to balsamic vinegar drizzled over fresh strawberries is silly, too obvious. But for those of you who have yet to taste this, a revelation awaits you! This is the single best way to eat strawberries as well as the single best way to consume balsamic vinegar. Most of the time balsamic on a green salad is too sweet for me, gimme Spanish sherry wine vinegar for that. Balsamic is made for strawberries! Anyway, you have 2 options for serving this simplest of dishes: as a snack,

1 cup quartered (big) or halved (small) strawberries
1 tablespoon (more or less to taste) balsamic vinegar
1 teaspoon (more or less to taste) sugar

Coat the strawberries with the balsamic and sugar in a bowl and let macerate for at least 30 minutes. The result is a delicious bowl of strawberries with the best sweet/tart sauce. It is a little ugly, though, the sauce being dark brown and all, making the red of the strawberries a little dingy. For a more elegantly pretty late spring dessert, follow this version:

-1 cup whole strawberries per person
-1 teaspoon balsamic per person
-1 teaspoon sugar per person

So, for a dinner party dessert for 6 people, place 6 tsps sugar and 6 tbsps balsamic in a small saucepan over medium-high heat and reduce to a thick syrup. (I used a candy thermometer and boiled the mixture to 230F.) Music to reduce vinegar by: "Float on" by Modest Mouse. Let cool. Drizzle the thick syrup over the whole strawberries and serve immediately. This provides a very lovely presentation since the now almost black syrup holds its shape rather than becoming a uniform brown coating on the berries. You can also drizzle the syrup on the empty dessert plates and the place the strawberries on top.

**Note: Cooking while listening to music and singing at the top of my lungs makes me really happy, so here on in, I'll be giving you suggestions for "music to cook by". Hope it inspires you as much as it does me.

Saturday, April 01, 2006

Tuna, It's What's For Dinner!

This is the tuna tataki we had for dinner last night. Delicious and really quick to make. If you want the recipe click here. We rounded this out with some Thai sticky rice and a really big green salad. Mmmmm... This dish is good for 2 for dinner or 4 as an appetizer. If you're chintzy on the tuna then you'll be less likely to get mercury poisoning! So there's a plus.


View My Stats